
 |

|
Backface Culling |
Tutorials > OpenGL ES > Backface Culling
| View Full Source |
Introduction
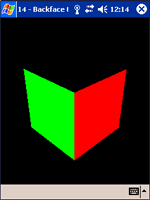 In tutorial 10, you will have noticed that
when the primitives rotate, their backs are also rendered. When creating a 3D
object such as the box in the previous tutorial,
we do not need the backs of the primitives(polygons) to be displayed.
In tutorial 10, you will have noticed that
when the primitives rotate, their backs are also rendered. When creating a 3D
object such as the box in the previous tutorial,
we do not need the backs of the primitives(polygons) to be displayed.
A technique known as backface culling is available to us to prevent the backfaces of the polygons from being rendered. This can save precious rendering time.
This tutorial follows on from the previous tutorial.
Contents of main.cpp :
A boolean variable is created to keep track of the polygon winding mode. This will be explained further down.
bool acw = true;
The first step we need to take to enable backface culling is to add the code below to our init method. To enable backface culling, we need to pass GL_CULL_FACE onto the glEnable function. This will cause all backface polygons to not be rendered.
You may be asking how we determine what side is backfacing? When you render various primitives, you specify front facing polygons by specifying vertices in an anti-clockwise direction. If you go back to all previous objects that we have drawn in the tutorials, you will notice that all primitives have been rendered by specifying vertices in an anti-clockwise direction.
glEnable(GL_CULL_FACE);
The next change we need to make is to our menu function.
Above, we stated that front facing polygons are specified by placing vertices in an anti-clockwise direction. We can change this by making a call to the glFrontFace function. This function can take one of two flags, GL_CCW and GL_CW. The default value is GL_CCW(counter-clockwise winding). If you pass GL_CW(clockwise) to the glFrontFace function, front facing polygons will be specified by placing vertices in a clockwise direction.
Another function which may be useful is the glCullFace function. This function specifies which faces should be culled(not rendered). The values that can be passed include GL_FRONT, GL_BACK and GL_FRONT_AND_BACK. The default value is obviously GL_BACK.
The code below reverses which faces are culled when selecting the Reverse Culling menu option.
void menu(int entry)
{
	.
	.
	case 2 :
		acw = !acw;

		glFrontFace(acw ? GL_CCW : GL_CW);

		break;
The second change we make is that if you select the Toggle Culling option, backface culling is enabled and disabled.
	case 3 :
		if (glIsEnabled(GL_CULL_FACE))
			glDisable(GL_CULL_FACE);
		else
			glEnable(GL_CULL_FACE);
		break;
	.
	.
}
When running the program, you can switch polygon winding by pressing 'r' and you can enable and disable backface culling by pressing 'f'.
You should now be able to cull faces that are never seen. This is very useful to speed up your programs. For every unseen polygon that is culled, another one can be rendered to make a different object more detailed.
Please let me know of any comments you may have : Contact Me
| GLUT|ES Source Files : |  |
|
| UG Source Files : | |
Last Updated : 20 November 2005
| < Tutorial 13 - Solid Shapes | Tutorial 15 - Lighting > |
All Rights Reserved, © Zeus Communication, Multimedia & Development 2004-2005
Read the Disclaimer
 |
|
|
|
What tutorial would you like to see next? |
|
Useful Books : 
|
Link to ZeusCMD

|